2024. 6. 5. 18:37ㆍDevelopment👩🏻🦳/C#
InitializeComponent 메서드
private void InitializeComponent()
{
    // 컨트롤 초기화
    this.label1 = new System.Windows.Forms.Label();
    this.label2 = new System.Windows.Forms.Label();
    this.label3 = new System.Windows.Forms.Label();
    this.textBox1 = new System.Windows.Forms.TextBox();
    this.comboBox1 = new System.Windows.Forms.ComboBox();
    this.comboBox2 = new System.Windows.Forms.ComboBox();
    this.button1 = new System.Windows.Forms.Button();
    this.SuspendLayout();

    // label1 설정
    this.label1.AutoSize = true;
    this.label1.Font = new System.Drawing.Font("궁서", 22F);
    this.label1.Location = new System.Drawing.Point(13, 13);
    this.label1.Name = "label1";
    this.label1.Size = new System.Drawing.Size(85, 30);
    this.label1.TabIndex = 0;
    this.label1.Text = "이름:";

    // label2 설정
    this.label2.AutoSize = true;
    this.label2.Font = new System.Drawing.Font("궁서", 22F);
    this.label2.Location = new System.Drawing.Point(13, 53);
    this.label2.Name = "label2";
    this.label2.Size = new System.Drawing.Size(85, 30);
    this.label2.TabIndex = 1;
    this.label2.Text = "호칭:";

    // label3 설정
    this.label3.AutoSize = true;
    this.label3.Font = new System.Drawing.Font("궁서", 22F);
    this.label3.Location = new System.Drawing.Point(13, 93);
    this.label3.Name = "label3";
    this.label3.Size = new System.Drawing.Size(125, 30);
    this.label3.TabIndex = 2;
    this.label3.Text = "거주지:";

    // textBox1 설정
    this.textBox1.Font = new System.Drawing.Font("궁서", 22F);
    this.textBox1.Location = new System.Drawing.Point(150, 10);
    this.textBox1.Name = "textBox1";
    this.textBox1.Size = new System.Drawing.Size(200, 40);
    this.textBox1.TabIndex = 3;

    // comboBox1 설정
    this.comboBox1.DropDownStyle = System.Windows.Forms.ComboBoxStyle.DropDownList;
    this.comboBox1.Font = new System.Drawing.Font("궁서", 24F);
    this.comboBox1.FormattingEnabled = true;
    this.comboBox1.Items.AddRange(new object[] {
    "Mr.",
    "Miss"});
    this.comboBox1.Location = new System.Drawing.Point(150, 50);
    this.comboBox1.Name = "comboBox1";
    this.comboBox1.Size = new System.Drawing.Size(200, 40);
    this.comboBox1.TabIndex = 4;

    // comboBox2 설정
    this.comboBox2.DropDownStyle = System.Windows.Forms.ComboBoxStyle.DropDownList;
    this.comboBox2.Font = new System.Drawing.Font("궁서", 24F);
    this.comboBox2.FormattingEnabled = true;
    this.comboBox2.Location = new System.Drawing.Point(150, 90);
    this.comboBox2.Name = "comboBox2";
    this.comboBox2.Size = new System.Drawing.Size(200, 40);
    this.comboBox2.TabIndex = 5;

    // button1 설정
    this.button1.Font = new System.Drawing.Font("궁서", 22F);
    this.button1.Location = new System.Drawing.Point(150, 140);
    this.button1.Name = "button1";
    this.button1.Size = new System.Drawing.Size(100, 40);
    this.button1.TabIndex = 6;
    this.button1.Text = "확인";
    this.button1.UseVisualStyleBackColor = true;
    this.button1.Click += new System.EventHandler(this.button1_Click);

    // Form2 설정
    this.AutoScaleDimensions = new System.Drawing.SizeF(6F, 13F);
    this.AutoScaleMode = System.Windows.Forms.AutoScaleMode.Font;
    this.ClientSize = new System.Drawing.Size(384, 211);
    this.Controls.Add(this.button1);
    this.Controls.Add(this.comboBox2);
    this.Controls.Add(this.comboBox1);
    this.Controls.Add(this.textBox1);
    this.Controls.Add(this.label3);
    this.Controls.Add(this.label2);
    this.Controls.Add(this.label1);
    this.Name = "Form2";
    this.Text = "Form2";
    this.Load += new System.EventHandler(this.Form2_Load);
    this.ResumeLayout(false);
    this.PerformLayout();
}
InitializeComponent 메서드 분석
목표: InitializeComponent 메서드가 하드웨어 및 소프트웨어와 어떻게 상호작용하는지, 그 메서드가 왜 특정 방식으로 설계되었는지, 발생할 수 있는 문제점과 해결 방안을 제시합니다.
요구사항
- C# 코드와 시스템의 상호작용 설명:
- 컴퓨터 시스템 아키텍처: CPU, 메모리, 입출력 장치, 운영 체제 등 기본 개념 이해.
- C# 컴파일 및 실행 과정: 소스 코드 작성, 컴파일, 어셈블리 생성, JIT 컴파일, 실행 단계 설명.
- 메모리 관리: 스택과 힙, 가비지 컬렉션의 동작 방식.
- 예제 코드 분석:
- 폼 초기화 메서드:
- 컨트롤 초기화, 폼 구성 요소 설정 및 배치.
- 이벤트 핸들러 설정 및 폼 로드 이벤트 처리.
- 코드의 하드웨어 및 소프트웨어적 근본 이해:
- 입출력 처리: 사용자가 폼에 입력한 데이터가 어떻게 처리되고 표시되는지.
- CPU와 메모리:
- 폼과 컨트롤의 배치 및 속성 설정이 CPU에 의해 처리되어 메모리에 저장.
- 이벤트 핸들러를 통해 사용자 입력이 실시간으로 반영.
- 메모리 관리:
- 폼과 컨트롤 객체가 메모리에 할당되고, 폼이 종료되면 가비지 컬렉션을 통해 메모리에서 해제.
- 폼 초기화 메서드:
- 설계 이유 및 문제 해결 방안:
- 함수별 설계 이유:
- InitializeComponent: 폼의 모든 컨트롤과 속성을 초기화.
- 각 컨트롤의 속성 설정 및 이벤트 핸들러 연결.
- 문제 발생 및 해결 방안:
- 잘못된 컨트롤 배치 및 속성 설정으로 인한 UI 문제 방지.
- 이벤트 핸들러 설정 오류 방지.
- 함수별 설계 이유:
- 반복 설명 최소화:
- 중복되는 기본 함수 설명을 피하고, 새로운 코드 베이스에 필요한 설명만 포함.
- 코드 상호작용 요약:
- 주요 함수와 상호작용 흐름:
- InitializeComponent 메서드의 전체 흐름.
- 각 컨트롤의 설정 및 배치와 이벤트 핸들러 연결.
- 함수 간의 상호작용을 통해 전체 프로그램의 흐름과 안정성을 유지하는 방식 설명.
- 주요 함수와 상호작용 흐름:
예제 코드
private void InitializeComponent()
{
    // 컨트롤 초기화
    this.label1 = new System.Windows.Forms.Label();
    this.label2 = new System.Windows.Forms.Label();
    this.label3 = new System.Windows.Forms.Label();
    this.textBox1 = new System.Windows.Forms.TextBox();
    this.comboBox1 = new System.Windows.Forms.ComboBox();
    this.comboBox2 = new System.Windows.Forms.ComboBox();
    this.button1 = new System.Windows.Forms.Button();
    this.SuspendLayout();

    // label1 설정
    this.label1.AutoSize = true;
    this.label1.Font = new System.Drawing.Font("궁서", 22F);
    this.label1.Location = new System.Drawing.Point(13, 13);
    this.label1.Name = "label1";
    this.label1.Size = new System.Drawing.Size(85, 30);
    this.label1.TabIndex = 0;
    this.label1.Text = "이름:";

    // label2 설정
    this.label2.AutoSize = true;
    this.label2.Font = new System.Drawing.Font("궁서", 22F);
    this.label2.Location = new System.Drawing.Point(13, 53);
    this.label2.Name = "label2";
    this.label2.Size = new System.Drawing.Size(85, 30);
    this.label2.TabIndex = 1;
    this.label2.Text = "호칭:";

    // label3 설정
    this.label3.AutoSize = true;
    this.label3.Font = new System.Drawing.Font("궁서", 22F);
    this.label3.Location = new System.Drawing.Point(13, 93);
    this.label3.Name = "label3";
    this.label3.Size = new System.Drawing.Size(125, 30);
    this.label3.TabIndex = 2;
    this.label3.Text = "거주지:";

    // textBox1 설정
    this.textBox1.Font = new System.Drawing.Font("궁서", 22F);
    this.textBox1.Location = new System.Drawing.Point(150, 10);
    this.textBox1.Name = "textBox1";
    this.textBox1.Size = new System.Drawing.Size(200, 40);
    this.textBox1.TabIndex = 3;

    // comboBox1 설정
    this.comboBox1.DropDownStyle = System.Windows.Forms.ComboBoxStyle.DropDownList;
    this.comboBox1.Font = new System.Drawing.Font("궁서", 24F);
    this.comboBox1.FormattingEnabled = true;
    this.comboBox1.Items.AddRange(new object[] {
    "Mr.",
    "Miss"});
    this.comboBox1.Location = new System.Drawing.Point(150, 50);
    this.comboBox1.Name = "comboBox1";
    this.comboBox1.Size = new System.Drawing.Size(200, 40);
    this.comboBox1.TabIndex = 4;

    // comboBox2 설정
    this.comboBox2.DropDownStyle = System.Windows.Forms.ComboBoxStyle.DropDownList;
    this.comboBox2.Font = new System.Drawing.Font("궁서", 24F);
    this.comboBox2.FormattingEnabled = true;
    this.comboBox2.Location = new System.Drawing.Point(150, 90);
    this.comboBox2.Name = "comboBox2";
    this.comboBox2.Size = new System.Drawing.Size(200, 40);
    this.comboBox2.TabIndex = 5;

    // button1 설정
    this.button1.Font = new System.Drawing.Font("궁서", 22F);
    this.button1.Location = new System.Drawing.Point(150, 140);
    this.button1.Name = "button1";
    this.button1.Size = new System.Drawing.Size(100, 40);
    this.button1.TabIndex = 6;
    this.button1.Text = "확인";
    this.button1.UseVisualStyleBackColor = true;
    this.button1.Click += new System.EventHandler(this.button1_Click);

    // Form2 설정
    this.AutoScaleDimensions = new System.Drawing.SizeF(6F, 13F);
    this.AutoScaleMode = System.Windows.Forms.AutoScaleMode.Font;
    this.ClientSize = new System.Drawing.Size(384, 211);
    this.Controls.Add(this.button1);
    this.Controls.Add(this.comboBox2);
    this.Controls.Add(this.comboBox1);
    this.Controls.Add(this.textBox1);
    this.Controls.Add(this.label3);
    this.Controls.Add(this.label2);
    this.Controls.Add(this.label1);
    this.Name = "Form2";
    this.Text = "Form2";
    this.Load += new System.EventHandler(this.Form2_Load);
    this.ResumeLayout(false);
    this.PerformLayout();
}
하드웨어 및 소프트웨어적 상호작용 요약
- 입출력 처리:
- 입력 장치: 사용자 입력을 받아 컨트롤에 반영.
- 출력 장치: 폼과 컨트롤이 모니터에 표시.
- CPU와 메모리:
- CPU 처리:
- 명령어 처리: 각 컨트롤의 초기화 및 설정이 CPU에 의해 처리.
- 이벤트 처리: 이벤트 핸들러를 통해 사용자 입력에 실시간 반응.
- 메모리 관리:
- 스택: 메서드 호출과 지역 변수 저장.
- 힙: 동적으로 생성된 객체(폼과 컨트롤) 저장.
- 가비지 컬렉션: 폼이 종료되면 메모리에서 객체 해제.
- CPU 처리:
- 문제 발생 및 해결 방안:
- 잘못된 컨트롤 배치 및 속성 설정으로 인한 UI 문제 방지.
- 이벤트 핸들러 설정 오류 방지.
-
- 코드 상호작용 요약:
- 주요 함수와 상호작용 흐름:
- InitializeComponent 메서드의 전체 흐름.
- 각 컨트롤의 설정 및 배치와 이벤트 핸들러 연결.
- 함수 간의 상호작용을 통해 전체 프로그램의 흐름과 안정성을 유지하는 방식 설명.
- 코드 상호작용 요약:
- 주요 함수와 상호작용 흐름:
- InitializeComponent 메서드의 전체 흐름.
- 각 컨트롤의 설정 및 배치와 이벤트 핸들러 연결.
- 함수 간의 상호작용을 통해 전체 프로그램의 흐름과 안정성을 유지하는 방식 설명.
- 주요 함수와 상호작용 흐름:
- 코드 상호작용 요약:
- 주요 함수와 상호작용 흐름:
- 코드 상호작용 요약:
하드웨어 및 소프트웨어적 상호작용 요약
- 입출력 처리:
- 입력 장치: 사용자 입력을 받아 컨트롤에 반영.
- 출력 장치: 폼과 컨트롤이 모니터에 표시.
- CPU와 메모리:
- CPU 처리:
- 명령어 처리: 각 컨트롤의 초기화 및 설정이 CPU에 의해 처리.
- 이벤트 처리: 이벤트 핸들러를 통해 사용자 입력에 실시간 반응.
- 메모리 관리:
- 스택: 메서드 호출과 지역 변수 저장.
- 힙: 동적으로 생성된 객체(폼과 컨트롤) 저장.
- 가비지 컬렉션: 폼이 종료되면 메모리에서 객체 해제.
- CPU 처리:
- 문제 발생 및 해결 방안:
- 잘못된 컨트롤 배치 및 속성 설정으로 인한 UI 문제 방지.
- 이벤트 핸들러 설정 오류 방지.
- 코드 상호작용:
- 주요 함수(InitializeComponent, 이벤트 핸들러)가 어떻게 상호작용하며 전체 프로그램의 흐름을 유지하는지 설명.
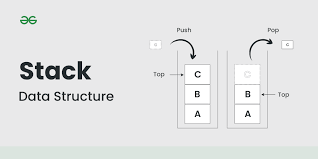
C#에서의 메모리 관리: 스택과 힙, 가비지 컬렉션
C#에서의 메모리 관리 방법을 이해하기 위해 다음의 InitializeComponent 메서드를 예제로 사용하겠습니다.
1. 스택(Stack)과 힙(Heap) 개요
- 스택:
- 특징: Last In, First Out (LIFO) 구조.
- 저장되는 데이터: 지역 변수, 매개변수, 값 타입 변수.
- 메모리 할당 및 해제: 매우 빠르며, 함수가 호출될 때 할당되고 함수가 종료될 때 해제.
- 용도: 주로 함수 호출과 관련된 데이터 저장.
- 힙:
- 특징: 동적 메모리 할당.
- 저장되는 데이터: 참조 타입 객체, 배열.
- 메모리 할당 및 해제: 비교적 느리며, 수동으로 할당하고 가비지 컬렉션에 의해 해제.
- 용도: 동적 데이터 저장, 프로그램 전반에 걸쳐 사용되는 큰 데이터 구조.
2. 스택(Stack)과 힙(Heap)에서의 데이터 저장 방식
- 값 타입(Value Type): 스택에 저장.
- 예: int, double, struct 등.
- 스택에 저장된 변수는 함수 호출 시 자동으로 할당되고 해제됨.
- 참조 타입(Reference Type): 힙에 저장, 스택에는 힙의 주소가 저장.
- 예: 클래스 객체, 배열, 문자열 등.
- 힙에 할당된 메모리는 명시적으로 해제하지 않으며, 가비지 컬렉션이 이를 관리.
메모리 관리의 세부 설명
메모리 관리는 프로그램이 실행되는 동안 데이터를 효율적으로 저장하고 접근할 수 있도록 하는 중요한 기능입니다. C#과 .NET 프레임워크는 메모리 관리를 자동으로 처리하지만, 그 동작 방식을 이해하면 더 효율적인 코드를 작성하는 데 도움이 됩니다.
스택 (Stack)
- 역할: 메서드 호출, 지역 변수, 매개 변수 등을 저장하는 공간입니다.
- 구조: LIFO(Last In, First Out) 구조로 작동하여, 가장 나중에 추가된 데이터가 가장 먼저 제거됩니다.
- 속도: 스택 메모리는 매우 빠른 접근 속도를 가집니다.
- 사용 예:
- 메서드 호출: 메서드가 호출될 때마다 호출 스택에 추가되며, 메서드가 반환될 때 스택에서 제거됩니다.
- 지역 변수: 메서드 내에서 선언된 변수는 스택에 저장됩니다.
- 매개 변수: 메서드 호출 시 전달된 인자는 스택에 저장됩니다.
- 제한 사항: 크기가 제한적이기 때문에 매우 큰 데이터를 저장하기에는 적합하지 않습니다.
void ExampleMethod()
{
    int x = 10;  // 지역 변수, 스택에 저장
    int y = 20;  // 지역 변수, 스택에 저장
    Console.WriteLine(x + y);
}
힙 (Heap)
- 역할: 동적으로 생성된 객체를 저장하는 공간입니다.
- 구조: 비정형적 데이터 구조로, 프로그램 실행 중에 메모리를 동적으로 할당하고 해제할 수 있습니다.
- 속도: 스택보다 메모리 접근 속도가 느리지만, 더 많은 양의 데이터를 저장할 수 있습니다.

- 사용 예:
- 객체 생성: new 키워드를 사용하여 생성된 객체는 힙에 저장됩니다.
- 폼과 컨트롤: Windows Forms나 WPF 애플리케이션에서 생성되는 폼과 컨트롤 객체는 힙에 저장됩니다.
- 관리: 힙 메모리는 가비지 컬렉션(Garbage Collection)을 통해 관리됩니다.
void CreateObject()
{
    MyClass obj = new MyClass();  // 객체, 힙에 저장
}
3. 가비지 컬렉션(Garbage Collection)
- 개요:
- 역할: 더 이상 사용되지 않는 메모리를 자동으로 회수하여 메모리 누수를 방지.
- 작동 방식: 참조 그래프를 통해 도달할 수 없는 객체를 식별하고 회수.
- 세대(Generation) 관리:
- Gen 0: 새로 할당된 객체. 가장 빈번하게 수집.
- Gen 1: 일시적으로 할당된 객체.
- Gen 2: 장기간 사용되는 객체. 가장 덜 빈번하게 수집.
- 효율성: 세대별로 객체를 나누어 관리하여 가비지 컬렉션의 효율성을 높임.
- 가비지 컬렉션 과정:
- 마크(Mark): 도달할 수 있는 객체를 식별하여 표시.
- 스윕(Sweep): 도달할 수 없는 객체를 메모리에서 제거.
- 컴팩션(Compaction): 남아있는 객체를 메모리의 한쪽으로 이동시켜 메모리 단편화를 방지.


https://en.wikipedia.org/wiki/Mark%E2%80%93compact_algorithm
Mark–compact algorithm - Wikipedia
From Wikipedia, the free encyclopedia In computer science, a mark–compact algorithm is a type of garbage collection algorithm used to reclaim unreachable memory. Mark–compact algorithms can be regarded as a combination of the mark–sweep algorithm and
en.wikipedia.org
가비지 컬렉션(Garbage Collection) 상세 분석
1. 마크(Mark): 도달할 수 있는 객체를 식별하여 표시
- 루트 집합(Root Set): 가비지 컬렉션은 루트 집합(root set)이라고 불리는 시작 지점에서 시작됩니다. 루트 집합에는 전역 변수, 스택 변수, CPU 레지스터 등이 포함됩니다. 이들 루트에서 시작하여 참조 가능한 모든 객체를 탐색합니다.
- 트리 구조 탐색: 루트 집합에서 시작하여 각 객체의 참조를 따라가며 모든 도달 가능한 객체를 탐색합니다. 이 과정에서 객체의 참조 그래프가 트리 구조로 형성됩니다.
- 객체 마킹: 도달 가능한 각 객체는 "마크"됩니다. 이는 해당 객체가 아직 사용 중임을 나타내기 위해 특정 플래그를 설정하거나 비트를 변경하는 방식으로 이루어집니다.
- 비효율적인 객체 식별: 마크 단계에서는 도달할 수 없는 객체를 식별하지 않습니다. 도달할 수 없는 객체는 다음 단계에서 처리됩니다.
2. 스윕(Sweep): 도달할 수 없는 객체를 메모리에서 제거
- 메모리 해제: 마크 단계에서 마킹되지 않은 객체들은 도달할 수 없는 것으로 간주됩니다. 이러한 객체들은 메모리에서 해제됩니다. 스윕 단계에서는 이러한 객체를 식별하고, 해당 메모리를 반환합니다.
- 프리 리스트(Free List): 해제된 메모리는 프리 리스트(free list)에 추가됩니다. 프리 리스트는 나중에 새 객체를 할당할 때 사용될 수 있는 가용 메모리 블록들의 목록입니다.
- 메모리 단편화 문제: 스윕 단계에서는 객체가 해제되지만, 메모리 단편화가 발생할 수 있습니다. 이는 해제된 메모리 블록들이 메모리 공간 전체에 흩어져 있을 때 발생합니다. 단편화가 심해지면 큰 객체를 할당하기 어려워질 수 있습니다.
3. 컴팩션(Compaction): 남아있는 객체를 메모리의 한쪽으로 이동시켜 메모리 단편화를 방지
- 메모리 정리: 컴팩션 단계에서는 남아있는 객체들을 메모리의 한쪽으로 이동시킵니다. 이로 인해 메모리 블록들이 연속적으로 배열되어, 단편화를 줄일 수 있습니다.
- 객체 이동: 객체들이 이동됨에 따라, 이들을 참조하는 포인터들도 업데이트되어야 합니다. 이는 모든 객체의 참조를 업데이트하는 과정이 필요합니다.
- 프리 블록 합병: 객체들이 이동된 후, 남아있는 빈 메모리 블록들이 하나의 큰 연속된 블록으로 합쳐집니다. 이는 큰 객체를 할당할 때 유용합니다.
전체 과정 요약
가비지 컬렉션의 전체 과정은 크게 세 단계로 나뉩니다: 마크, 스윕, 컴팩션. 이 과정은 다음과 같이 요약할 수 있습니다:
- 마크(Mark):
- 루트 집합에서 시작하여 모든 도달 가능한 객체를 탐색하고 마킹.
- 마킹된 객체는 사용 중임을 표시.
- 스윕(Sweep):
- 마킹되지 않은, 도달할 수 없는 객체를 식별하고 메모리에서 제거.
- 해제된 메모리는 프리 리스트에 추가.
- 컴팩션(Compaction):
- 남아있는 객체들을 메모리의 한쪽으로 이동.
- 참조 포인터를 업데이트.
- 남은 빈 메모리 블록들을 합병하여 연속된 큰 블록으로 만듦.
이 세 단계는 메모리 관리의 효율성을 높이고, 메모리 단편화를 줄이며,
프로그램의 성능을 유지하는 데 중요한 역할을 합니다.
https://learn.microsoft.com/en-us/dotnet/standard/garbage-collection/
구현 예제 요약
1. N 값에 따른 구구단 출력
using System;
using System.Windows.Forms;

namespace GugudanApp
{
    public partial class Form1 : Form
    {
        public Form1()
        {
            InitializeComponent(); // 초기화
        }

        private void buttonCalculate_Click(object sender, EventArgs e)
        {
            // 입력 값이 유효한 숫자인지 확인
            if (int.TryParse(textBoxInput.Text, out int number))
            {
                DisplayGugudan(number); // 유효한 숫자일 경우 구구단 출력
            }
            else
            {
                // 유효하지 않은 경우 오류 메시지 표시
                MessageBox.Show("유효한 숫자를 입력하세요.", "입력 오류", MessageBoxButtons.OK, MessageBoxIcon.Error);
                textBoxInput.Clear(); // 입력 필드 비우기
            }
        }

        private void DisplayGugudan(int number)
        {
            textBoxResult.Clear(); // 결과 창 비우기
            for (int i = 1; i <= number; i++)
            {
                for (int j = 1; j <= 9; j++)
                {
                    // 구구단 결과 출력
                    textBoxResult.AppendText($"{i} X {j} = {i * j}{Environment.NewLine}");
                }
                textBoxResult.AppendText(Environment.NewLine); // 단 구분
            }
        }

        private void textBoxInput_KeyPress(object sender, KeyPressEventArgs e)
        {
            // 엔터키를 누르면 계산 실행
            if (e.KeyChar == (char)Keys.Enter)
            {
                e.Handled = true;
                buttonCalculate_Click(sender, e); // 계산 버튼 클릭 이벤트 호출
            }
        }
    }
}
2. 9단 이상 입력 시 예외 처리
using System;
using System.Windows.Forms;

namespace GugudanApp
{
    public partial class Form1 : Form
    {
        public Form1()
        {
            InitializeComponent(); // 초기화
        }

        private void buttonCalculate_Click(object sender, EventArgs e)
        {
            // 입력 값이 1에서 9 사이의 유효한 숫자인지 확인
            if (int.TryParse(textBoxInput.Text, out int number) && number <= 9)
            {
                DisplayGugudan(number); // 유효한 숫자일 경우 구구단 출력
            }
            else
            {
                // 유효하지 않은 경우 오류 메시지 표시
                MessageBox.Show("1에서 9 사이의 숫자를 입력하세요.", "입력 오류", MessageBoxButtons.OK, MessageBoxIcon.Error);
                textBoxInput.Clear(); // 입력 필드 비우기
            }
        }

        private void DisplayGugudan(int number)
        {
            textBoxResult.Clear(); // 결과 창 비우기
            for (int i = 1; i <= 9; i++)
            {
                // 구구단 결과 출력
                textBoxResult.AppendText($"{number} X {i} = {number * i}{Environment.NewLine}");
            }
        }

        private void textBoxInput_KeyPress(object sender, KeyPressEventArgs e)
        {
            // 엔터키를 누르면 계산 실행
            if (e.KeyChar == (char)Keys.Enter)
            {
                e.Handled = true;
                buttonCalculate_Click(sender, e); // 계산 버튼 클릭 이벤트 호출
            }
        }
    }
}
3. 문자 입력 예외 처리
using System;
using System.Windows.Forms;

namespace GugudanApp
{
    public partial class Form1 : Form
    {
        public Form1()
        {
            InitializeComponent(); // 초기화
        }

        private void buttonCalculate_Click(object sender, EventArgs e)
        {
            // 입력 값이 유효한 숫자인지 확인
            if (int.TryParse(textBoxInput.Text, out int number))
            {
                DisplayGugudan(number); // 유효한 숫자일 경우 구구단 출력
            }
            else
            {
                // 유효하지 않은 경우 오류 메시지 표시
                MessageBox.Show("유효한 숫자를 입력하세요.", "입력 오류", MessageBoxButtons.OK, MessageBoxIcon.Error);
                textBoxInput.Clear(); // 입력 필드 비우기
            }
        }

        private void DisplayGugudan(int number)
        {
            textBoxResult.Clear(); // 결과 창 비우기
            for (int i = 1; i <= 9; i++)
            {
                // 구구단 결과 출력
                textBoxResult.AppendText($"{number} X {i} = {number * i}{Environment.NewLine}");
            }
        }

        private void textBoxInput_KeyPress(object sender, KeyPressEventArgs e)
        {
            // 엔터키를 누르면 계산 실행
            if (e.KeyChar == (char)Keys.Enter)
            {
                e.Handled = true;
                buttonCalculate_Click(sender, e); // 계산 버튼 클릭 이벤트 호출
            }
        }
    }
}
4. 구구단을 3열로 출력
using System;
using System.Windows.Forms;

namespace GugudanApp
{
    public partial class Form1 : Form
    {
        public Form1()
        {
            InitializeComponent(); // 초기화
        }

        private void buttonCalculate_Click(object sender, EventArgs e)
        {
            // 입력 값이 유효한 숫자인지 확인
            if (int.TryParse(textBoxInput.Text, out int number))
            {
                DisplayGugudan(number); // 유효한 숫자일 경우 구구단 출력
            }
            else
            {
                // 유효하지 않은 경우 오류 메시지 표시
                MessageBox.Show("유효한 숫자를 입력하세요.", "입력 오류", MessageBoxButtons.OK, MessageBoxIcon.Error);
                textBoxInput.Clear(); // 입력 필드 비우기
            }
        }

        private void DisplayGugudan(int maxMultiplier)
        {
            textBoxResult.Clear(); // 결과 창 비우기
            for (int i = 1; i <= 9; i++)
            {
                for (int j = 0; j < 3; j++)
                {
                    int currentDan = i + j * maxMultiplier; // 현재 단 계산
                    string result = $"{currentDan} X {i} = {currentDan * i}";
                    textBoxResult.AppendText(result.PadRight(20)); // 오른쪽 패딩으로 정렬
                }
                textBoxResult.AppendText(Environment.NewLine); // 단 구분
            }
        }

        private void textBoxInput_KeyPress(object sender, KeyPressEventArgs e)
        {
            // 엔터키를 누르면 계산 실행
            if (e.KeyChar == (char)Keys.Enter)
            {
                e.Handled = true;
                buttonCalculate_Click(sender, e); // 계산 버튼 클릭 이벤트 호출
            }
        }
    }
}
5. 추가 기능 - N개의 곱셈 계산
using System;
using System.Windows.Forms;

namespace GugudanApp
{
    public partial class Form1 : Form
    {
        public Form1()
        {
            InitializeComponent(); // 초기화
        }

        private void buttonCalculate_Click(object sender, EventArgs e)
        {
            // 입력 값이 유효한 숫자인지 확인
            if (int.TryParse(textBoxInput.Text, out int number))
            {
                DisplayMultiplication(number); // 유효한 숫자일 경우 곱셈 계산 출력
            }
            else
            {
                // 유효하지 않은 경우 오류 메시지 표시
                MessageBox.Show("유효한 숫자를 입력하세요.", "입력 오류", MessageBoxButtons.OK, MessageBoxIcon.Error);
                textBoxInput.Clear(); // 입력 필드 비우기
            }
        }

        private void DisplayMultiplication(int number)
        {
            textBoxResult.Clear(); // 결과 창 비우기
            for (int i = 1; i <= number; i++)
            {
                for (int j = 1; j <= number; j++)
                {
                    // 곱셈 결과 출력
                    textBoxResult.AppendText($"{i} X {j} = {i * j}{Environment.NewLine}");
                }
                textBoxResult.AppendText(Environment.NewLine); // 줄바꿈으로 구분
            }
        }

        private void textBoxInput_KeyPress(object sender, KeyPressEventArgs e)
        {
            // 엔터키를 누르면 계산 실행
            if (e.KeyChar == (char)Keys.Enter)
            {
                e.Handled = true;
                buttonCalculate_Click(sender, e); // 계산 버튼 클릭 이벤트 호출
            }
        }
    }
}
6. 구구단의 결과를 가운데 정렬하고 간격 조정
using System;
using System.Windows.Forms;

namespace GugudanApp
{
    public partial class Form1 : Form
    {
        public Form1()
        {
            InitializeComponent(); // 초기화
        }

        private void buttonCalculate_Click(object sender, EventArgs e)
        {
            // 입력 값이 유효한 숫자인지 확인
            if (int.TryParse(textBoxInput.Text, out int number))
            {
                DisplayGugudan(number); // 유효한 숫자일 경우 구구단 출력
            }
            else
            {
                // 유효하지 않은 경우 오류 메시지 표시
                MessageBox.Show("유효한 숫자를 입력하세요.", "입력 오류", MessageBoxButtons.OK, MessageBoxIcon.Error);
                textBoxInput.Clear(); // 입력 필드 비우기
            }
        }

        private void DisplayGugudan(int number)
        {
            textBoxResult.Clear(); // 결과 창 비우기
            for (int i = 1; i <= 9; i++)
            {
                for (int j = 0; j < 3; j++)
                {
                    int currentDan = i + j * number; // 현재 단 계산
                    string result = $"{currentDan} X {i} = {currentDan * i}";
                    textBoxResult.AppendText(result.PadRight(20)); // 오른쪽 패딩으로 정렬
                }
                textBoxResult.AppendText(Environment.NewLine); // 단 구분
            }
        }

        private void textBoxInput_KeyPress(object sender, KeyPressEventArgs e)
        {
            // 엔터키를 누르면 계산 실행
            if (e.KeyChar == (char)Keys.Enter)
            {
                e.Handled = true;
                buttonCalculate_Click(sender, e); // 계산 버튼 클릭 이벤트 호출
            }
        }
    }
}
코드 흐름 리뷰
- 입력값 확인: int.TryParse를 통해 입력 값이 유효한 숫자인지 확인합니다.
- 구구단 출력: 유효한 숫자일 경우, 주어진 단(또는 범위)에 대한 구구단을 출력합니다.
- 예외 처리: 유효하지 않은 입력 값에 대해 메시지 박스를 통해 오류를 사용자에게 알립니다.
- 엔터키 처리: 텍스트 입력 중 엔터키를 누르면 계산 버튼 클릭 이벤트를 호출하여 계산을 실행합니다.
- 출력 형식: 구구단 결과를 가운데 정렬하고, 간격을 조정하여 가독성을 높입니다.
이 구조는 각 코드 베이스에서 다양한 기능을 수행하면서 코드의 재사용성과 확장성을 고려하였습니다.